Just ordered the ATO pressure switch. I've still been using my old JBJ ATO. Just want to be sure that I have a clue what to do when it comes in. Is the pressure switch setup just by using the Wizard? If so, what settings would I be looking at? Thanks in advance!
Jerry
New ATO pressure switch-setup with Wizard?
-
rimai
- Posts: 12857
- Joined: Fri Mar 18, 2011 6:47 pm
Re: New ATO pressure switch-setup with Wizard?
Not yet.
We don't even have the ATO function created yet.
So, when it comes in, we can go through setting it up with a custom function for now.
Then I can add to the libraries and wizard.
We don't even have the ATO function created yet.
So, when it comes in, we can go through setting it up with a custom function for now.
Then I can add to the libraries and wizard.
Roberto.
-
wolfpack
- Posts: 24
- Joined: Thu Sep 06, 2012 10:11 pm
Re: New ATO pressure switch-setup with Wizard?
super easy to setup! I have a quick, easy code you can use after you calibrate and set what level you want your sump at.
-
alexwbush
- Posts: 327
- Joined: Tue Mar 22, 2011 12:45 am
- Location: San Diego, CA
Re: New ATO pressure switch-setup with Wizard?
^ sorry, that was from me... sometimes I forget which RA I am looking at
-
barbianj
- Posts: 56
- Joined: Sat Jul 21, 2012 12:25 pm
Re: New ATO pressure switch-setup with Wizard?
This will be the first time that I will have to add custom code. The Wizard has done everything I needed so far. So, do I open the last Wizard generated sketch file, paste the code in the appropriate place, save the file, then upload it to the RA?
Also, until the Wizard is updated, would I have to re-insert the custom code if I were to change some parameters using the Wizard?
Also, also, I'm not exactly clear on the whole loading code vs in the memory thing. Where can I read up on this?
Also, until the Wizard is updated, would I have to re-insert the custom code if I were to change some parameters using the Wizard?
Also, also, I'm not exactly clear on the whole loading code vs in the memory thing. Where can I read up on this?
-
rimai
- Posts: 12857
- Joined: Fri Mar 18, 2011 6:47 pm
Re: New ATO pressure switch-setup with Wizard?
Yesbarbianj wrote:This will be the first time that I will have to add custom code. The Wizard has done everything I needed so far. So, do I open the last Wizard generated sketch file, paste the code in the appropriate place, save the file, then upload it to the RA??
Yesbarbianj wrote: Also, until the Wizard is updated, would I have to re-insert the custom code if I were to change some parameters using the Wizard?
With internal memory, you can use a remote app to change settings on the fly, but it will use up more memory.barbianj wrote: Also, also, I'm not exactly clear on the whole loading code vs in the memory thing. Where can I read up on this?
Roberto.
-
barbianj
- Posts: 56
- Joined: Sat Jul 21, 2012 12:25 pm
Re: New ATO pressure switch-setup with Wizard?
Thank you, Roberto. At least I'm on the right track. So, since I have the RA+, internal memory is less of an issue, correct? Any reason not to load it into internal memory?
-
rimai
- Posts: 12857
- Joined: Fri Mar 18, 2011 6:47 pm
-
alexwbush
- Posts: 327
- Joined: Tue Mar 22, 2011 12:45 am
- Location: San Diego, CA
Re: New ATO pressure switch-setup with Wizard?
Here's a quick and easy setup that I've been using until a function with timeout has been developed. It works quite well. I have a code developed with internal memory values so I can adjust it on the fly as well that I could share if you like.
If your menu doesn't have water level calibration already, run your code through the latest version of wizard.
Then hook in the water level expansion and run the calibration from the wizard. This will tell you what your current water level is so that you have a baseline for where you want the water level to sit.
Basics of my code:
1. Port 5 is my ATO pump, replace port 5 with whatever port you're using to pump in RO.
2. I want it to top off when the water level is at 60%, replace this with whatever value you wish
3. I want it to stop topping off when the water level is at 62%, replace this with whatever value you with. You can mess with it and create a much simpler code, but you'll find if you just say turn on when below X, it will turn on and off and might burn out your top off pump.
4. I also impletemented a failsafe. Port 8 is my return pump. I said that if the water level is at 0% (the tube is out of the water), turn off port 8. Replace this with whatever port you like or get rid of this part of the code all together.
Add this to the custom code section:
Code: Select all
    byte topofflevel=60;
  // If water level less than 60, turn on auto top off relay; else, keep it off
  if (ReefAngel.WaterLevel.GetLevel()<topofflevel)
  {
     topofflevel=62;
     ReefAngel.Relay.On(Port5);
  }
  else
  {
     topofflevel=60;
     ReefAngel.Relay.Off(Port5);
   }
  // If water level equals 0, turn off return relay; else, keep it on
  if (ReefAngel.WaterLevel.GetLevel()==0) ReefAngel.Relay.Off(Port8);
else ReefAngel.Relay.On(Port8);-
barbianj
- Posts: 56
- Joined: Sat Jul 21, 2012 12:25 pm
Re: New ATO pressure switch-setup with Wizard?
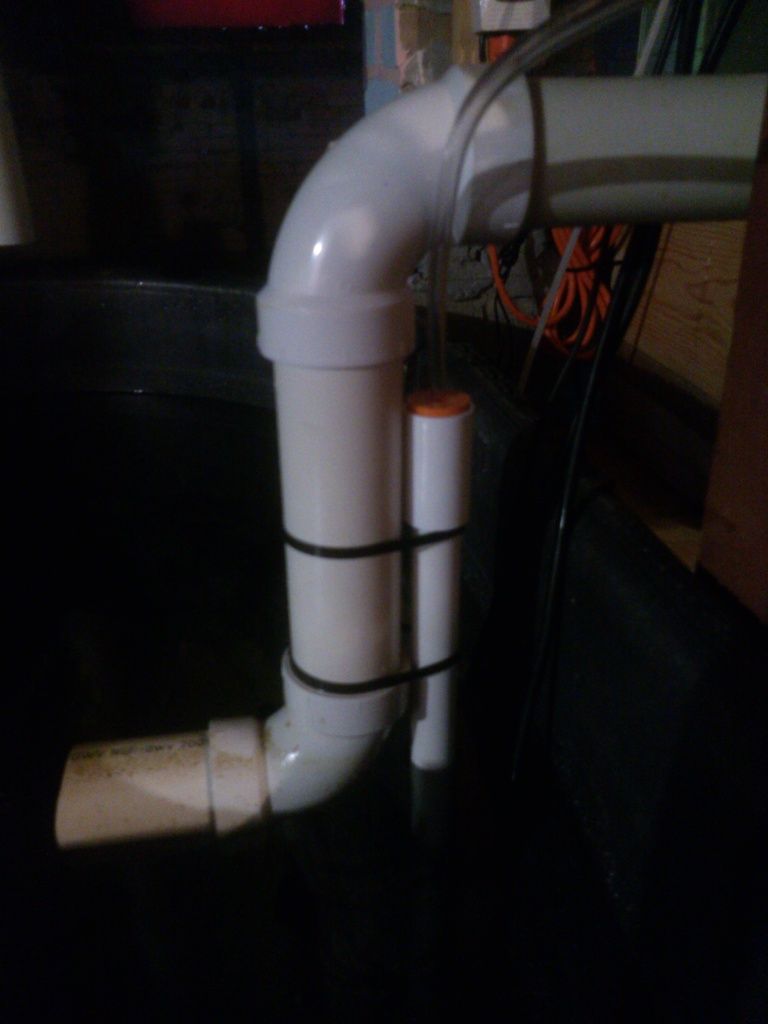
The pressure switch came in. Before I get into the coding, I need to mount it in the sump.
In the meantime, should I glue the pvc tubes together?
In the meantime, should I glue the pvc tubes together?
-
rimai
- Posts: 12857
- Joined: Fri Mar 18, 2011 6:47 pm
Re: New ATO pressure switch-setup with Wizard?
either use pvc weld or use teflon.
Your choice.
Just make sure it is air tight.
Your choice.
Just make sure it is air tight.
Roberto.
-
barbianj
- Posts: 56
- Joined: Sat Jul 21, 2012 12:25 pm
Re: New ATO pressure switch-setup with Wizard?
Alrighty then. Glued the pieces together with primer and pvc cement, and zip tied it to the sump drain pipe. Very tight and secure.
Uploaded some code from the wizard so that the water level calibration showed up on the head unit. Calibrated the switch and set it back in place. Very simple and straightforward.
Where my PVC tube sat, the RA read around 42. I uploaded alexwbush's code, with values of 45 and 40, instead of 62 and 60, and changed his port5 to port1 for my ATO pump.
The code compiled and uploaded fine, and the ATO pump was not on initially, as was expected. Then, I took a bucket of water out of the sump, so that the level fell to about 38. The pump turned on and started to fill, as it should. However, when the level got close to 40, the pump switches off and on, rather than filling to 45, and then turning off. What am I missing?
#include <ReefAngel_Features.h>
#include <Globals.h>
#include <RA_Wifi.h>
#include <Wire.h>
#include <OneWire.h>
#include <Time.h>
#include <DS1307RTC.h>
#include <InternalEEPROM.h>
#include <RA_NokiaLCD.h>
#include <RA_ATO.h>
#include <RA_Joystick.h>
#include <LED.h>
#include <RA_TempSensor.h>
#include <Relay.h>
#include <RA_PWM.h>
#include <Timer.h>
#include <Memory.h>
#include <InternalEEPROM.h>
#include <RA_Colors.h>
#include <RA_CustomColors.h>
#include <Salinity.h>
#include <RF.h>
#include <IO.h>
#include <ORP.h>
#include <AI.h>
#include <PH.h>
#include <WaterLevel.h>
#include <ReefAngel.h>
////// Place global variable code below here
////// Place global variable code above here
void setup()
{
// This must be the first line
ReefAngel.Init(); //Initialize controller
// Ports toggled in Feeding Mode
ReefAngel.FeedingModePorts = Port1Bit | Port5Bit | Port6Bit | Port7Bit | Port8Bit;
// Ports toggled in Water Change Mode
ReefAngel.WaterChangePorts = Port1Bit | Port7Bit | Port8Bit;
// Ports toggled when Lights On / Off menu entry selected
ReefAngel.LightsOnPorts = Port2Bit | Port3Bit | Port4Bit;
// Ports turned off when Overheat temperature exceeded
ReefAngel.OverheatShutoffPorts = Port7Bit;
// Use T1 probe as temperature and overheat functions
ReefAngel.TempProbe = T1_PROBE;
ReefAngel.OverheatProbe = T1_PROBE;
// Set the Overheat temperature setting
InternalMemory.OverheatTemp_write( 800 );
// Ports that are always on
ReefAngel.Relay.On( Port6 );
ReefAngel.Relay.On( Port8 );
////// Place additional initialization code below here
////// Place additional initialization code above here
}
void loop()
{
ReefAngel.StandardLights( Port2,6,0,23,0 );
ReefAngel.StandardLights( Port3,13,0,22,0 );
ReefAngel.StandardLights( Port4,14,0,18,0 );
ReefAngel.Wavemaker( Port5,6 );
ReefAngel.StandardHeater( Port7,766,770 );
////// Place your custom code below here
byte topofflevel=40;
// If water level less than 40, turn on auto top off relay; else, keep it off
if (ReefAngel.WaterLevel.GetLevel()<topofflevel)
{
topofflevel=45;
ReefAngel.Relay.On(Port1);
}
else
{
topofflevel=40;
ReefAngel.Relay.Off(Port1);
}
// If water level equals 0, turn off return relay; else, keep it on
if (ReefAngel.WaterLevel.GetLevel()==0) ReefAngel.Relay.Off(Port8);
else ReefAngel.Relay.On(Port8);
////// Place your custom code above here
// This should always be the last line
ReefAngel.Portal( "barbianj" );
ReefAngel.ShowInterface();
}
void DrawCustomMain()
{
int x,y;
char text[10];
// Parameters
#if defined DisplayLEDPWM && ! defined RemoveAllLights
ReefAngel.LCD.DrawMonitor( 15, 20, ReefAngel.Params,
ReefAngel.PWM.GetDaylightValue(), ReefAngel.PWM.GetActinicValue() );
#else // defined DisplayLEDPWM && ! defined RemoveAllLights
ReefAngel.LCD.DrawMonitor( 15, 20, ReefAngel.Params );
#endif // defined DisplayLEDPWM && ! defined RemoveAllLights
pingSerial();
// Water Level
ReefAngel.LCD.DrawText( COLOR_DARKGOLDENROD,DefaultBGColor,75,66, "WL:" );
ReefAngel.LCD.DrawText( COLOR_DARKGOLDENROD,DefaultBGColor,99,66, ReefAngel.WaterLevel.GetLevel() );
pingSerial();
// Main Relay Box
byte TempRelay = ReefAngel.Relay.RelayData;
TempRelay &= ReefAngel.Relay.RelayMaskOff;
TempRelay |= ReefAngel.Relay.RelayMaskOn;
ReefAngel.LCD.DrawOutletBox( 12, 92, TempRelay );
pingSerial();
// Date and Time
ReefAngel.LCD.DrawDate( 6, 122 );
pingSerial();
}
void DrawCustomGraph()
{
}
-
rimai
- Posts: 12857
- Joined: Fri Mar 18, 2011 6:47 pm
Re: New ATO pressure switch-setup with Wizard?
Try this very simple one instead:
Code: Select all
  if (ReefAngel.WaterLevel.GetLevel()<40 && ReefAngel.WaterLevel.GetLevel()>0) ReefAngel.Relay.On(Port1);
  if (ReefAngel.WaterLevel.GetLevel()>45) ReefAngel.Relay.Off(Port1);
Roberto.
-
barbianj
- Posts: 56
- Joined: Sat Jul 21, 2012 12:25 pm
Re: New ATO pressure switch-setup with Wizard?
Thank you so much, Roberto! I'm very pleased with the function and accuracy of the pressure switch.
Do you think that the switch should have a time-out for the pump like the ATO float does?
Do you think that the switch should have a time-out for the pump like the ATO float does?
-
rimai
- Posts: 12857
- Joined: Fri Mar 18, 2011 6:47 pm
Re: New ATO pressure switch-setup with Wizard?
Yes, it will have.
We just need to come up with the code.
I was waiting for Alex to come back, but if you want to move forward, I'll get something put together.
We just need to come up with the code.
I was waiting for Alex to come back, but if you want to move forward, I'll get something put together.
Roberto.
-
barbianj
- Posts: 56
- Joined: Sat Jul 21, 2012 12:25 pm
Re: New ATO pressure switch-setup with Wizard?
Sure, I would feel better having a safeguard in place.
-
alexwbush
- Posts: 327
- Joined: Tue Mar 22, 2011 12:45 am
- Location: San Diego, CA
Re: New ATO pressure switch-setup with Wizard?
hey! Sorry, I've been super busy with work.
I think the problem is with where we initialized the topofflevel variable. In my code, I use memory locations. Move the byte topofflevel=40; line up the global variables section in the ino.
So, delete that line from the custom code pasted and move it up higher. Like this:
I'm betting that will work. So here was the problem with the code... essentially, when it dropped below 40, we set the new top off level to 45. The problem is we set it back to 40 again when it ran through the code again  . By moving the declaration of the topofflevel variable to the global variable section, we set it to 40 the first time, then it will run the code and not be set to 40 every time the code runs through. Sorry for the confusion.
I think the problem is with where we initialized the topofflevel variable. In my code, I use memory locations. Move the byte topofflevel=40; line up the global variables section in the ino.
So, delete that line from the custom code pasted and move it up higher. Like this:
Code: Select all
////// Place global variable code below here

byte topofflevel=40;

////// Place global variable code above here-
rimai
- Posts: 12857
- Joined: Fri Mar 18, 2011 6:47 pm
Re: New ATO pressure switch-setup with Wizard?
Hey Curt,
I think we can just another class to the RA_ATO, can't we?
That way we don't need the redo the SingleATO function, right?
I think we can just another class to the RA_ATO, can't we?
Code: Select all
class RA_ATO_WaterLevelClass : public RA_ATO_WaterLevelClass
{
public:
// define functions here
};
Roberto.
-
binder
- Posts: 2865
- Joined: Fri Mar 18, 2011 6:20 pm
- Location: Illinois
- Contact:
Re: New ATO pressure switch-setup with Wizard?
yeah, we can create another ato class that is tied to the water level switch. this way when you activate the water level functionality, that class can be brought in too.rimai wrote:Hey Curt,
I think we can just another class to the RA_ATO, can't we?That way we don't need the redo the SingleATO function, right?Code: Select all
class RA_ATO_WaterLevelClass : public RA_ATO_WaterLevelClass
{
public:
// define functions here
};
or you could possibly add another function to the ato class that reads the water level stuff and is similar to the singleato function. it could be like singleatowaterlevel. then we could use the defines for water level to include it or not.
now i have not looked over the libraries to confirm this second option i mentioned.
just to make sure I'm following this discussion properly, let me recap what i think we are trying to do...
we are trying to mimic the ato functionality with the water level sensor along with a timeout safeguard (that exists in the ato functions). correct?
-
rimai
- Posts: 12857
- Joined: Fri Mar 18, 2011 6:47 pm
Re: New ATO pressure switch-setup with Wizard?
Correctbinder wrote: just to make sure I'm following this discussion properly, let me recap what i think we are trying to do...
we are trying to mimic the ato functionality with the water level sensor along with a timeout safeguard (that exists in the ato functions). correct?
Roberto.
-
alexwbush
- Posts: 327
- Joined: Tue Mar 22, 2011 12:45 am
- Location: San Diego, CA
Re: New ATO pressure switch-setup with Wizard?
but we want safeguards one day too 
-
Sebyte
Re: New ATO pressure switch-setup with Wizard?
Hi Roberto
My sensor arrived today, thanks.
How far off are you from having the "old ATO" function replicated for the water level sensor. If it looks like it will be within two weeks I will hold off installing until then.
Regards
My sensor arrived today, thanks.
How far off are you from having the "old ATO" function replicated for the water level sensor. If it looks like it will be within two weeks I will hold off installing until then.
Regards
-
rimai
- Posts: 12857
- Joined: Fri Mar 18, 2011 6:47 pm
Re: New ATO pressure switch-setup with Wizard?
I pushed the libraries changes to branch issue54.
We just need to test
Anyone interested?
The function works like this:
ATO pump on Port1
Timeout is 30 seconds
Low Level is 61
High Level is 63
You will need the attached files:
Overwrite the existing ones:
ReefAngel.cpp - Documents\Arduino\libraries\ReefAngel
ReefAngel.h - Documents\Arduino\libraries\ReefAngel
feature.txt - Documents\Arduino\update
We just need to test
Anyone interested?
The function works like this:
Code: Select all
ReefAngel.WaterLevelATO(Port1,30,61,63);
Timeout is 30 seconds
Low Level is 61
High Level is 63
You will need the attached files:
Overwrite the existing ones:
ReefAngel.cpp - Documents\Arduino\libraries\ReefAngel
ReefAngel.h - Documents\Arduino\libraries\ReefAngel
feature.txt - Documents\Arduino\update
You do not have the required permissions to view the files attached to this post.
Roberto.
-
binder
- Posts: 2865
- Joined: Fri Mar 18, 2011 6:20 pm
- Location: Illinois
- Contact:
Re: New ATO pressure switch-setup with Wizard?
The code looks good inside ReefAngel.cpp. My only comment is that the function will not trigger unless the level falls below Low Level and won't stop until the value exceeds the High Level (or the timeout is exceeded of course). This is perfectly fine though. Just thought I'd point this out.
-
rimai
- Posts: 12857
- Joined: Fri Mar 18, 2011 6:47 pm
Re: New ATO pressure switch-setup with Wizard?
I thought that is how it was supposed to work, right?
Did you have anything else in mind?
Did you have anything else in mind?
Roberto.
-
rimai
- Posts: 12857
- Joined: Fri Mar 18, 2011 6:47 pm
Re: New ATO pressure switch-setup with Wizard?
It's based on the StandardATO
I just reused it.
I just reused it.
Roberto.
-
Sebyte
Re: New ATO pressure switch-setup with Wizard?
Just tested out the above.
Results.
1. Menu shows calibration for sensor, but shows 100% = 0.
This is the code for that part of menu
2. Port 2 (which I set for my ATO pump) called all the time.
Code used
For the time being I have reverted back to original INO
Any comments guys?
Results.
1. Menu shows calibration for sensor, but shows 100% = 0.
This is the code for that part of menu
Code: Select all
    // Water Level
    ReefAngel.LCD.DrawText( COLOR_DARKGOLDENROD,DefaultBGColor,75,66, "WL:" );
    ReefAngel.LCD.DrawText( COLOR_DARKGOLDENROD,DefaultBGColor,99,66, ReefAngel.WaterLevel.GetLevel() );
    pingSerial();
Code used
Code: Select all
void loop()
{

   // Specific functions that use Internal Memory values

    // Water level sensor on port 2
      ReefAngel.WaterLevelATO(Port2,30,61,63);
//

ReefAngel.StandardHeater( Port3 );Any comments guys?
-
Sebyte
Re: New ATO pressure switch-setup with Wizard?
Re my last post:
If there had been two jumpers in the box it would have reminded me to link SDA and SCL pins.
I guess that is why I could not calibrate sensor. I will have a look around and see if I can find two jumpers. Hopefully that will sort things out.
If there had been two jumpers in the box it would have reminded me to link SDA and SCL pins.
I guess that is why I could not calibrate sensor. I will have a look around and see if I can find two jumpers. Hopefully that will sort things out.
-
Sebyte
Re: New ATO pressure switch-setup with Wizard?
OK jumpers in and calibrated, 100% = 1708. Is this a normal value?
Removed 2 cups water from tank and ATO pump started up. I am using the RA peristaltic ATO pump and it works fine. As the water reached the max level the relay started clicking on and off rapidly until the water level reached 100%. I am a little concerned as to the effect on the relay contacts over an extended period of time.
Should the water level reading on the main screen show the level of change to the water sensor? Mine is showing 100% even when I had removed water from the tank.
-
rimai
- Posts: 12857
- Joined: Fri Mar 18, 2011 6:47 pm
Re: New ATO pressure switch-setup with Wizard?
No, it shouldn't go to 100%.
ReefAngel.WaterLevelATO(Port2,30,61,63);
It should start at 61 and stop at 63.
I'll see if I can find some time to test it too.
ReefAngel.WaterLevelATO(Port2,30,61,63);
It should start at 61 and stop at 63.
I'll see if I can find some time to test it too.
Roberto.